home school art lessons: Fancy Elephant & Pretty Peacock, Hiding Tigers
Our India Unit study wasn't complete without some hands on art projects for kids. We chose three animals to represent India. Please find below our original peacock projects from a simple color, cut and paste for younger students to a more intricate design image using painted paper.
The fancy elephants inspired by Deep Space Sparkle - took on a 'life' of their own when we added bangles and sparkles from our sewing box. And last but not least tigers hiding in the grass (as inspired by our Usborne book of things to draw). These kids crafts were created by my 2nd through 5th graders with much enthusiasm.
The fancy elephants inspired by Deep Space Sparkle - took on a 'life' of their own when we added bangles and sparkles from our sewing box. And last but not least tigers hiding in the grass (as inspired by our Usborne book of things to draw). These kids crafts were created by my 2nd through 5th graders with much enthusiasm.
|
|
|
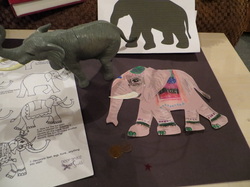
Fancy Elephant Art Project
We started with a silhouette image of an elephant - cut out of gray construction paper.
Here's the image we used.
The students were encouraged to view a photograph of an actual elephant (painted and unpainted) to determine if they wanted to add skin wrinkles, toe nails and tusks. I also had a nice plastic model to determine ear placement.
Then with a box of oil pastels, glue sticks and scraps of painted paper the children were encouraged to decorate their elephants anyway they desired.
In some of the images you will see a worksheet from Deep Space Sparkle on Decorated Elephants. I believe I got this worksheet from her Art 101 course I took last year. *Highly recommend that course for parents as well as art instructors! My students used the decorated elephant worksheet as reference for their decorative placements instead of for actually drawing the elephant. We avoided some of the initial frustration we had drawing elephants by tracing the silhouette and spending our creative time decorating.
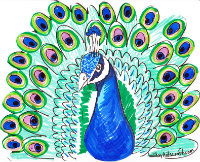
PEACOCK ART PROJECT
Recommended for k- 2nd grade Peacock craft for kids. Make this kids peacock craft using our printable template and following our simple instructions. Materials: Printable craft template tail feathers | peacock body printable reference sheet pdf Cardstock tape, scissors, glue and pencil coloring pencils, pens or crayons This printable craft is designed to create a standing peacock. Slightly bend the tail feathers to create an angle that will allow the cardstock to stand alone. Glue the face to the front middle. It is also possible to attach it to a toilet tube for more stability. More about the male peacock: National Geographic EVEN MORE! because we had so much fun...
Painted Paper Peacock
instructions coming soon!
Kids Created Coloring Pages!
Coming Soon
India Architecture
Coming Soon |
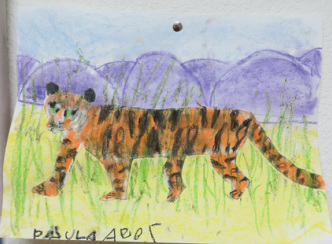
Tiger in the Grass Art Lesson Materials Heavyweight paper (with a texture works better) Artist Chalks pastels Oil Pastels Reference picture (we used this link on google) 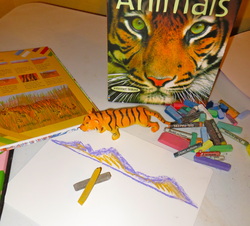
Step 1 Create a background
using chalk pastels Divide the sky from the ground with a horizontal line. (about a third of the way down) Add mountains above the horizon Fill in the sky using the side of your pastel and rubbing with your finger 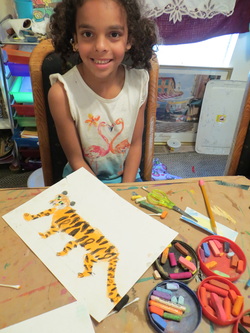
Step 2 Draw your tiger
We took our time and practiced drawing a tiger on a separate piece of paper before adding him to our chalk background Here's what we used to practice drawing tigers How to Draw A Tiger Printable 1 Step 3 Begin drawing your tiger on the chalk background with pencil. Then outline with orange oil pastel. Don't worry to much about little mistakes - remember he will be hiding in the grass. You need a nice basic shape to the body - Tigers are LONG and a long tail too! Step 4 Add patterns to the fur using oil pastels oranges, yellows and finally the black. See this beautiful image of a tiger stripes below. 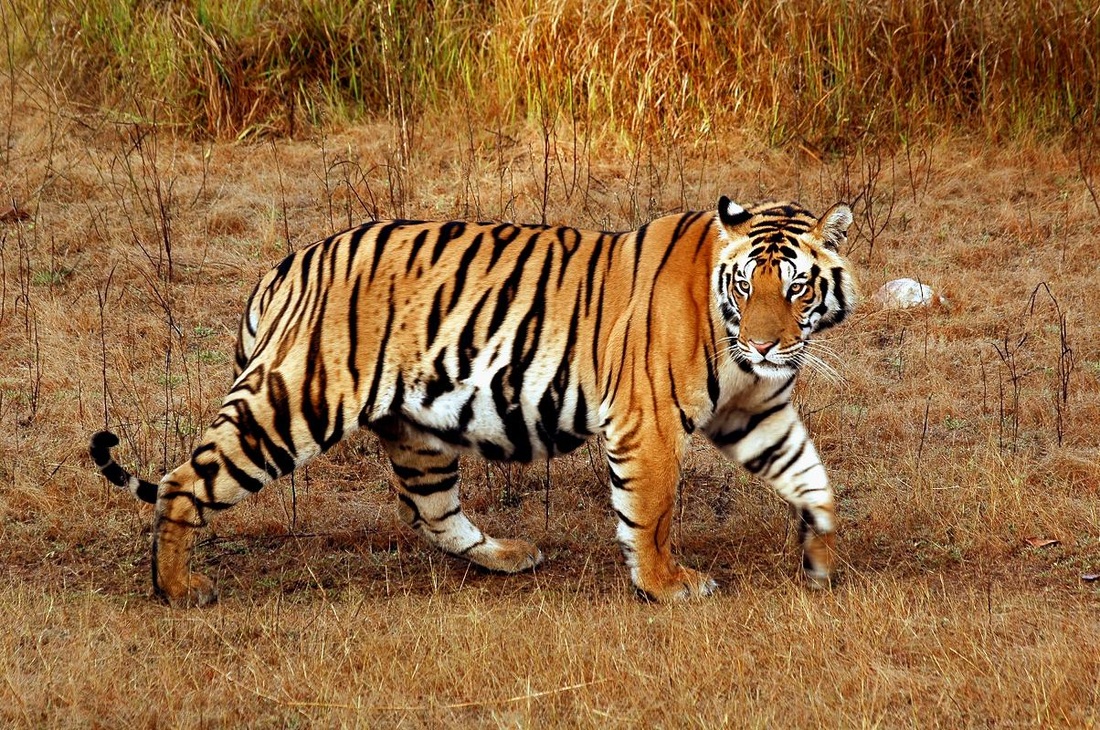
Step 5
Finally Hide him in the tall grass starting at the bottom of the page (just as grass grows upwards towards the sky) use quick strokes to create grass in greens and browns. OH - not too much though. We still want to see the tiger! |
